As long as the Avatax addon is turned on, every transaction (A/R Invoices and A/R Credit memos) flows automatically to the Avalara portal.
To verify that every A/R Invoice and A/R Credit Memo is uploaded to the Avalara Web Portal, and if it´s properly uploaded, you can use the Avatax Reconcile SAP Documents on Avalara Tool.
If some documents are not posted in Avalara, you can force posting them with this tool.
Important note: When posting documents using this feature, please mind that the calculated taxes will not be stored in the SAP documents because invoices are not editable. You will need to manually create the journal entry on the sales tax account.
To use the tool:
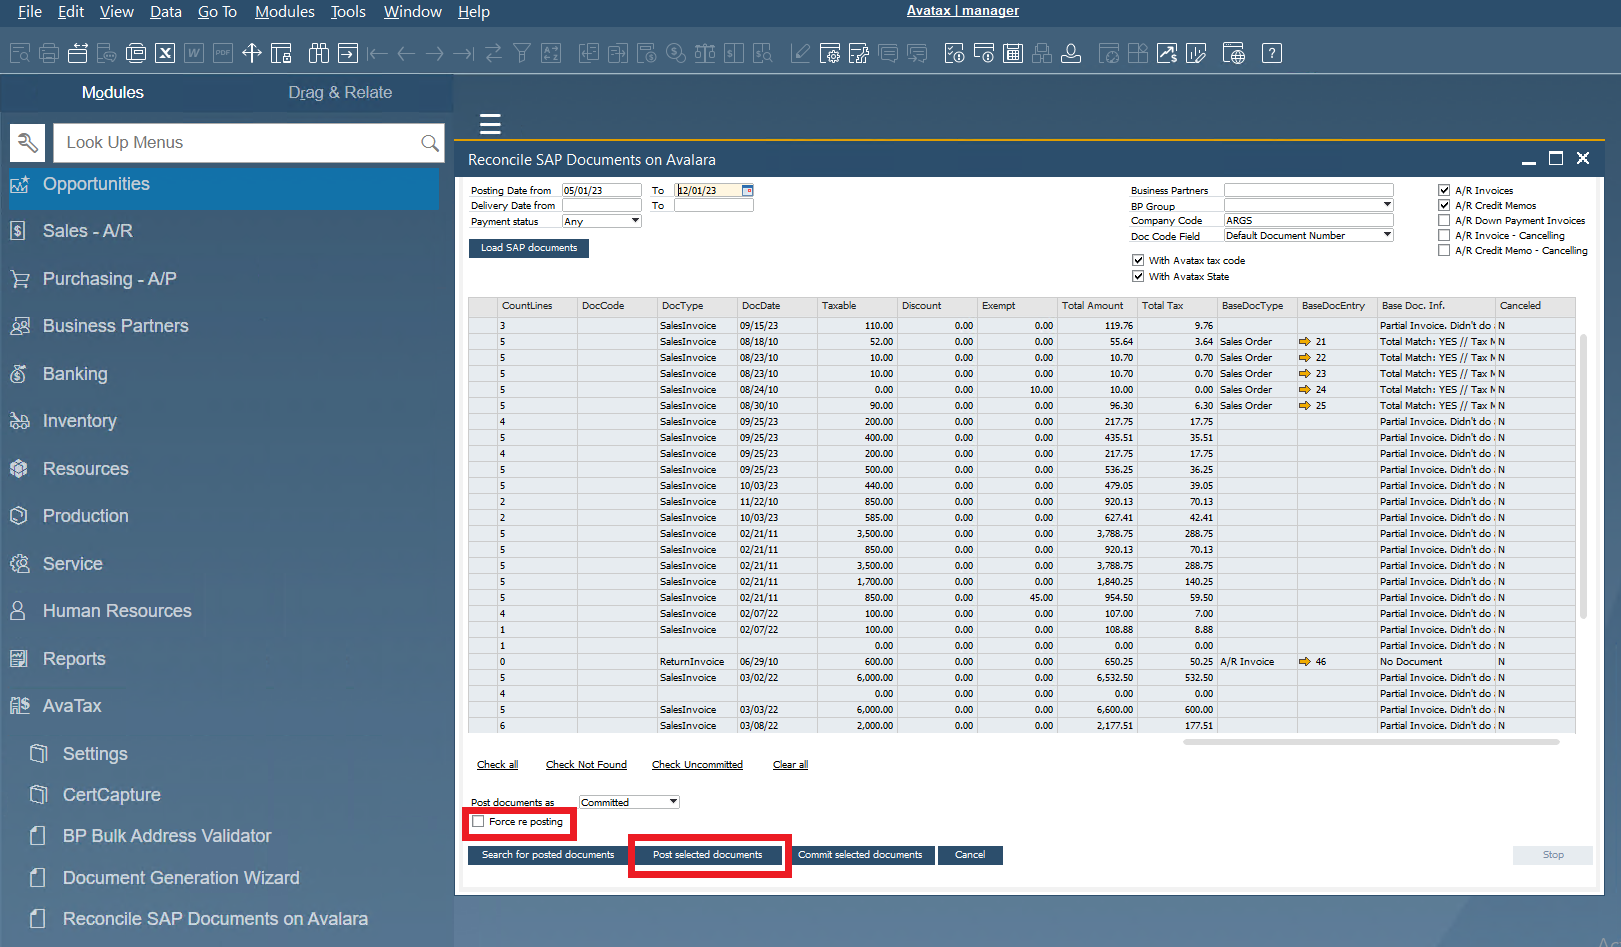
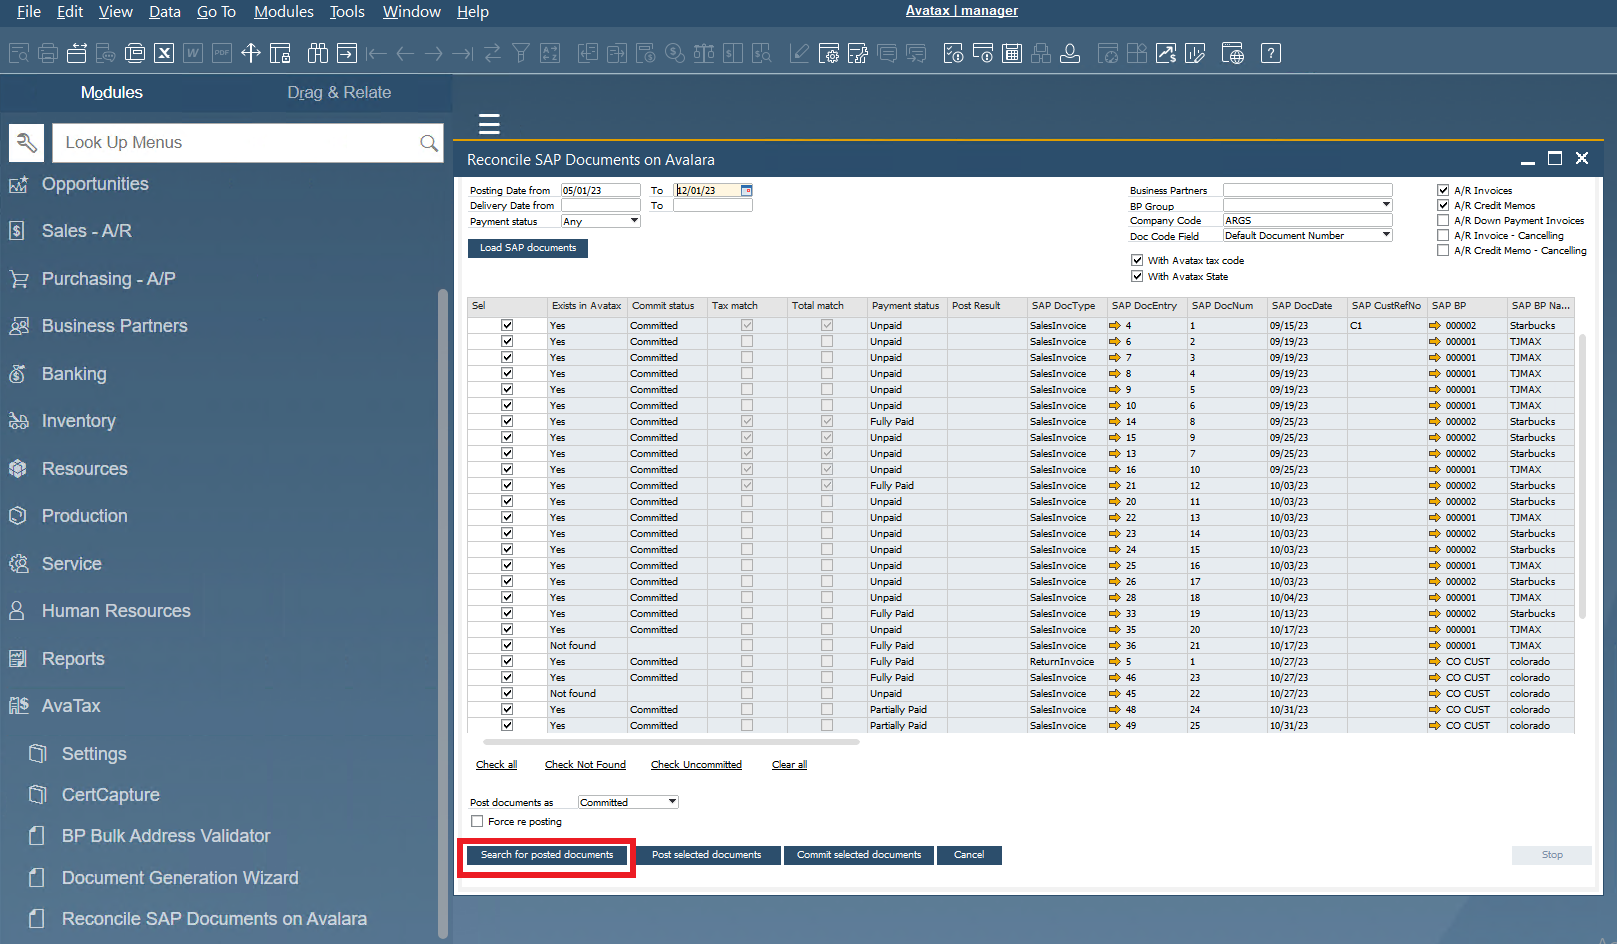
1. Open the AvaTax Reconcile SAP Documents on the Avalara module by selecting it on the AvaTax menu within your SAP.

2. Select a posting or delivery date range, payment status, business partner, company code, and type of document to load SAP documents and click “Load SAP Documents”

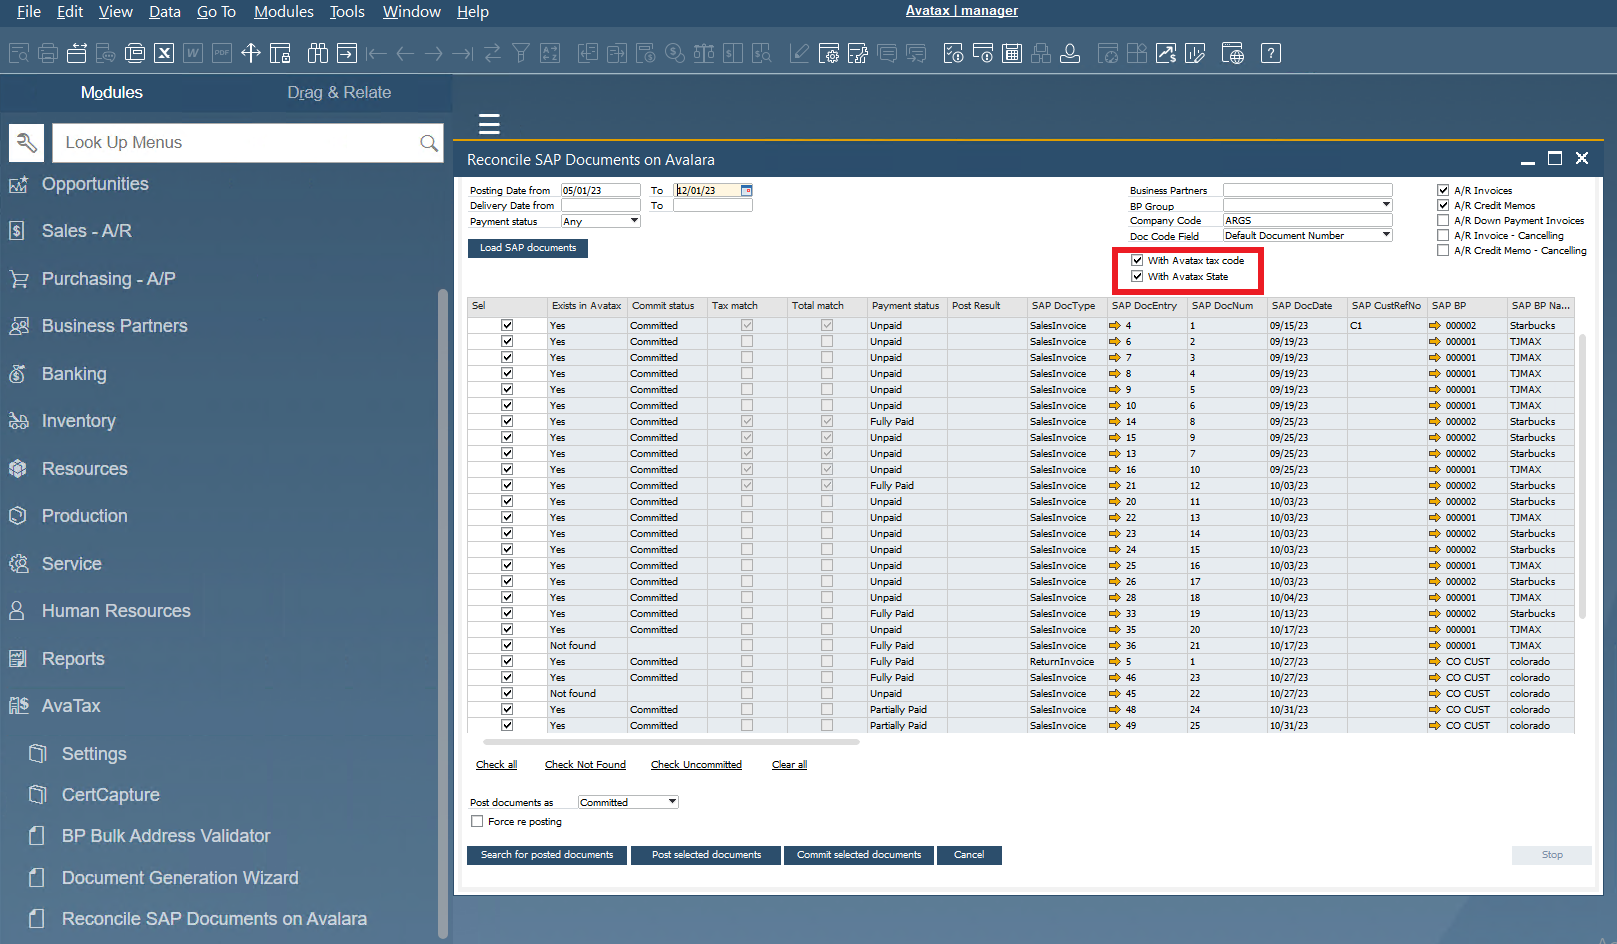
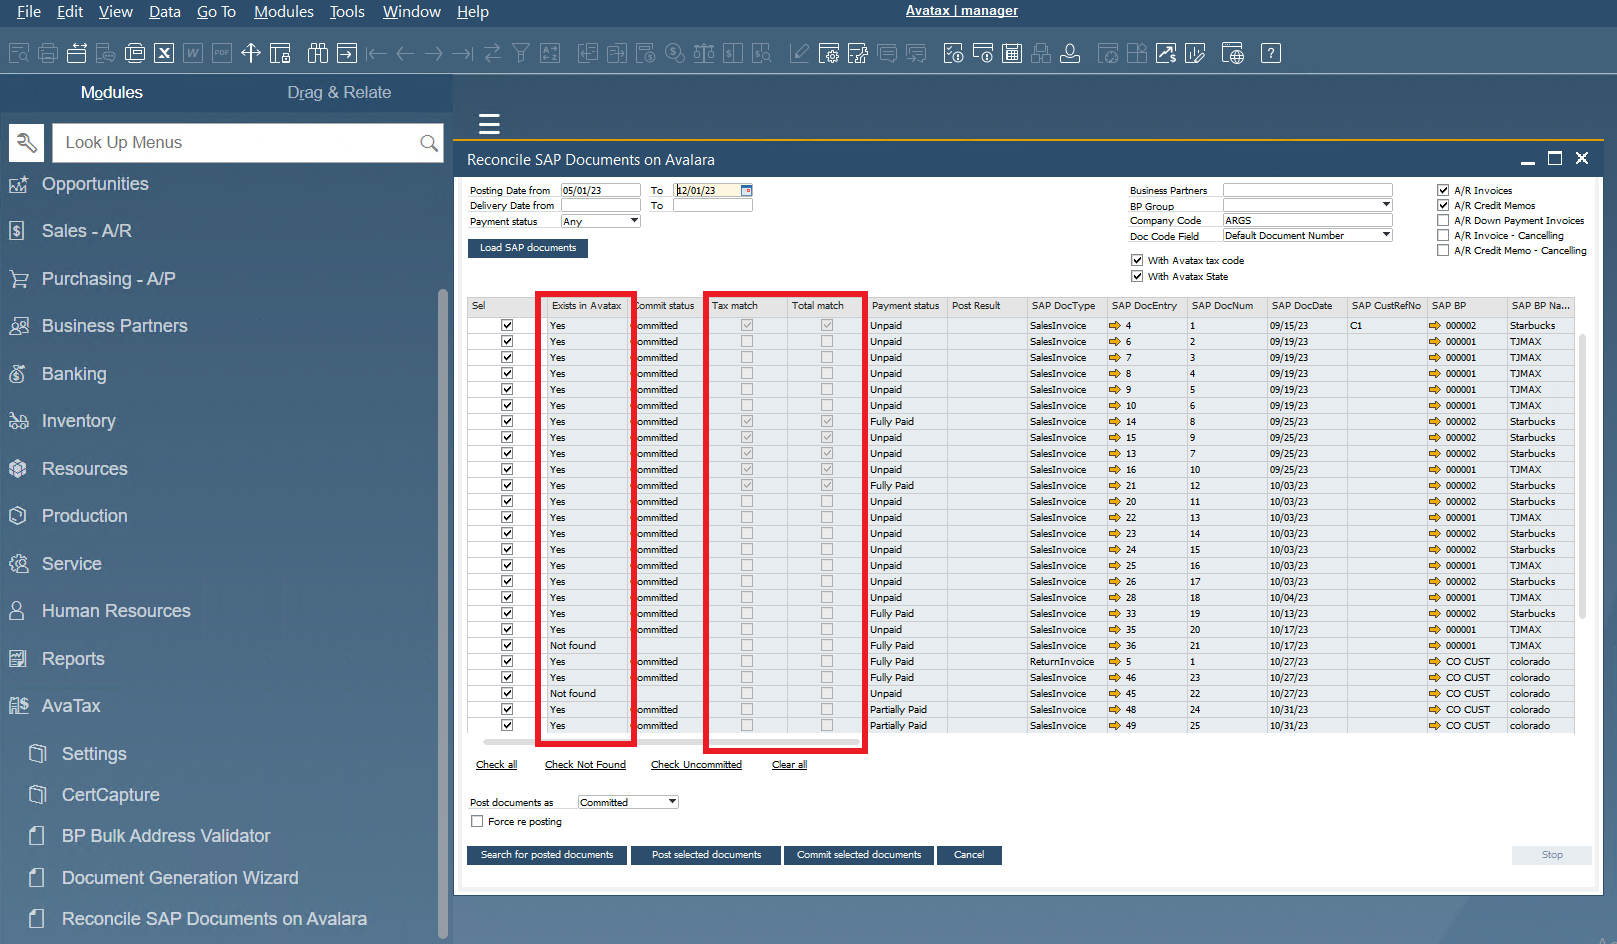
3. Check or uncheck the options “with Avatax tax code” and “with Avatax tax state” depending on, if for the date range selected, you were using the Avatax tax code in all your documents.
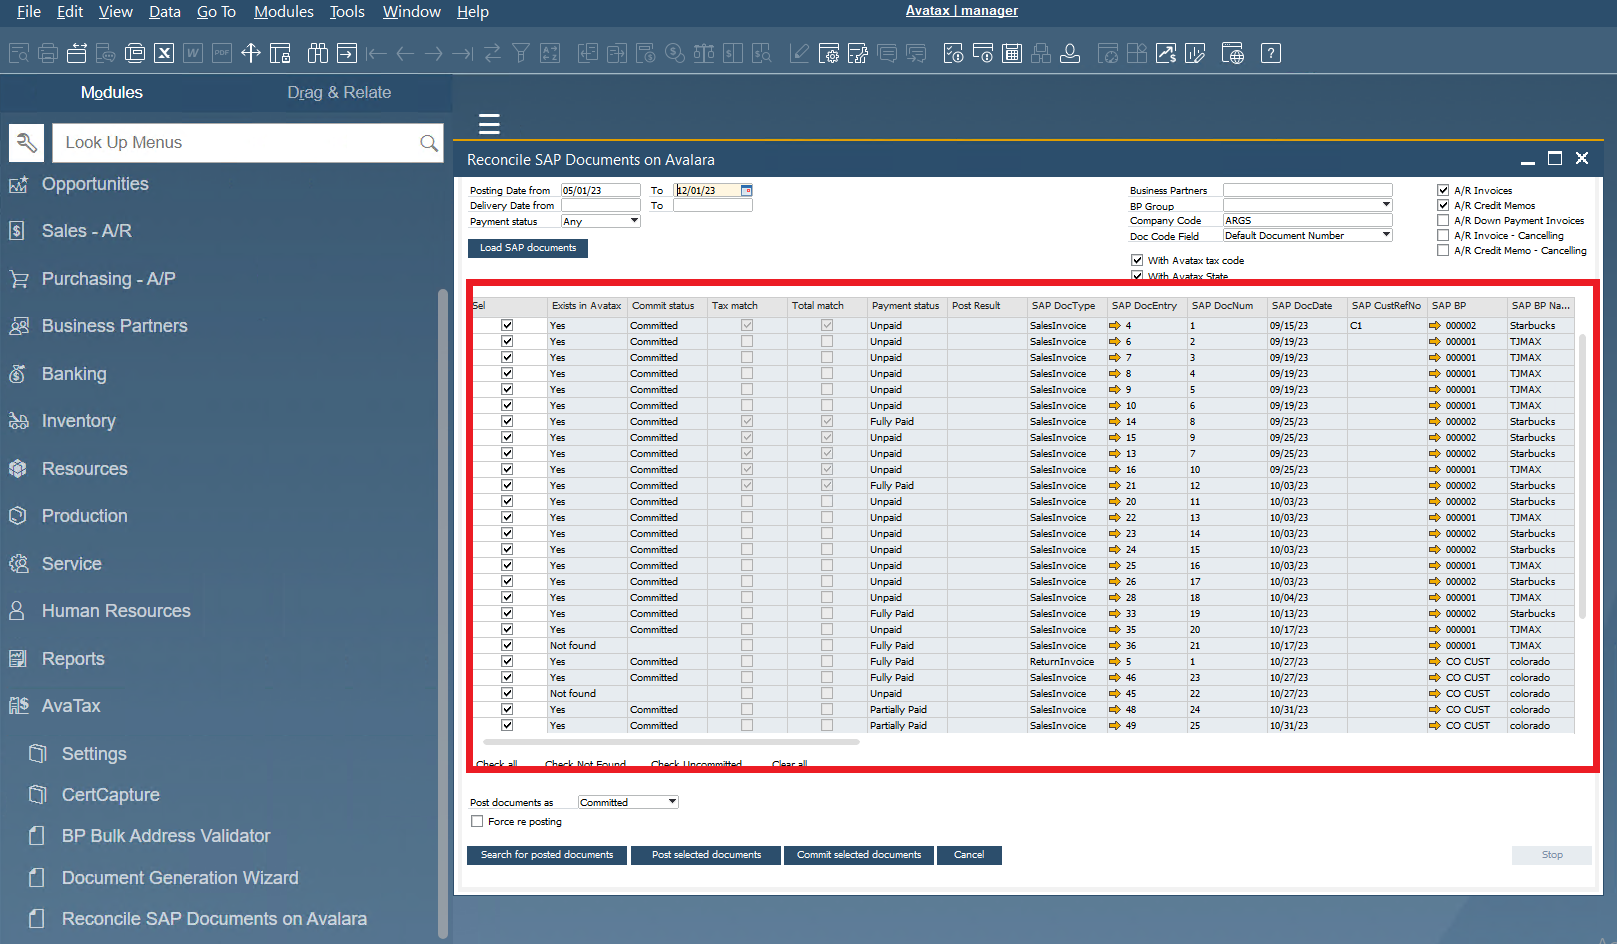
4. The table will list the SAP documents that match the filter criteria.
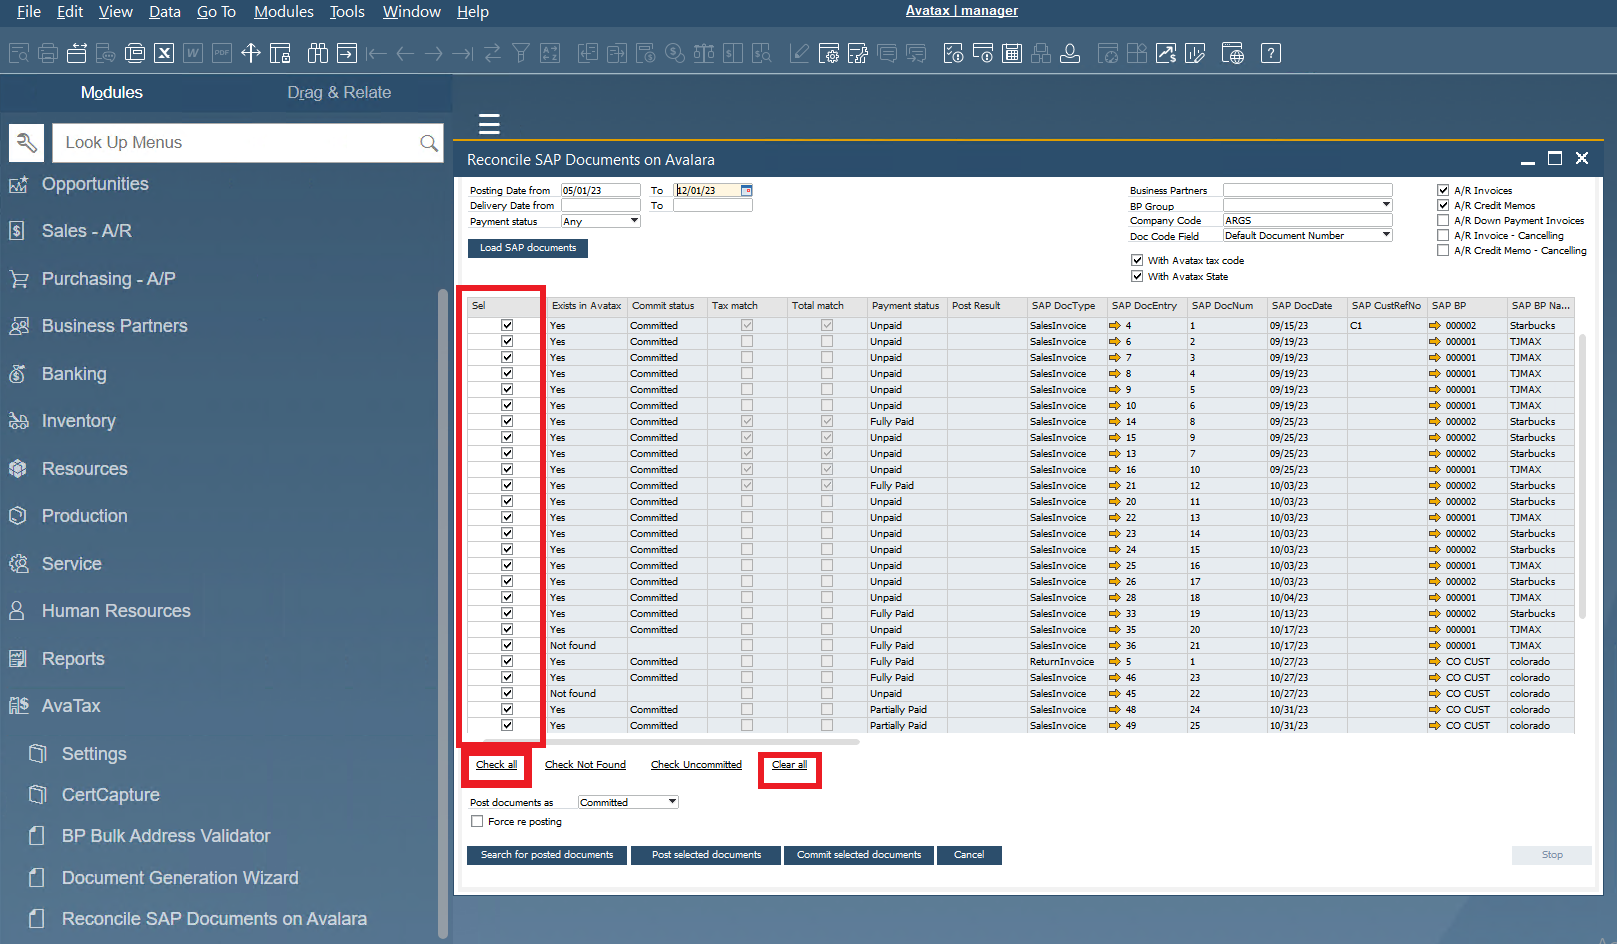
5. Select which of the listed documents you would like to check in Avalara. Check the checkbox on the “Sel” column to select each document or click on the “Check all” or “Clear all” buttons to select or unselect all documents.
6. Click “Search for posted documents”.
7. The table will now list on the checked documents the information found in Avalara for the same document number. The “Exists in Avatax” column will let you know if the document was found or not in Avalara. The “tax match” and “total match” columns will let you know if the information found in Avalara is the same as the one found in SAP.
8. Select which of the “not found” listed documents you would like to upload to Avalara. Check the checkbox on the “Sel” column to select each document or click on the “Check all” or “Clear all” buttons to select or unselect all documents.
9. Select if you want to post those documents as “committed” or “uncommitted”
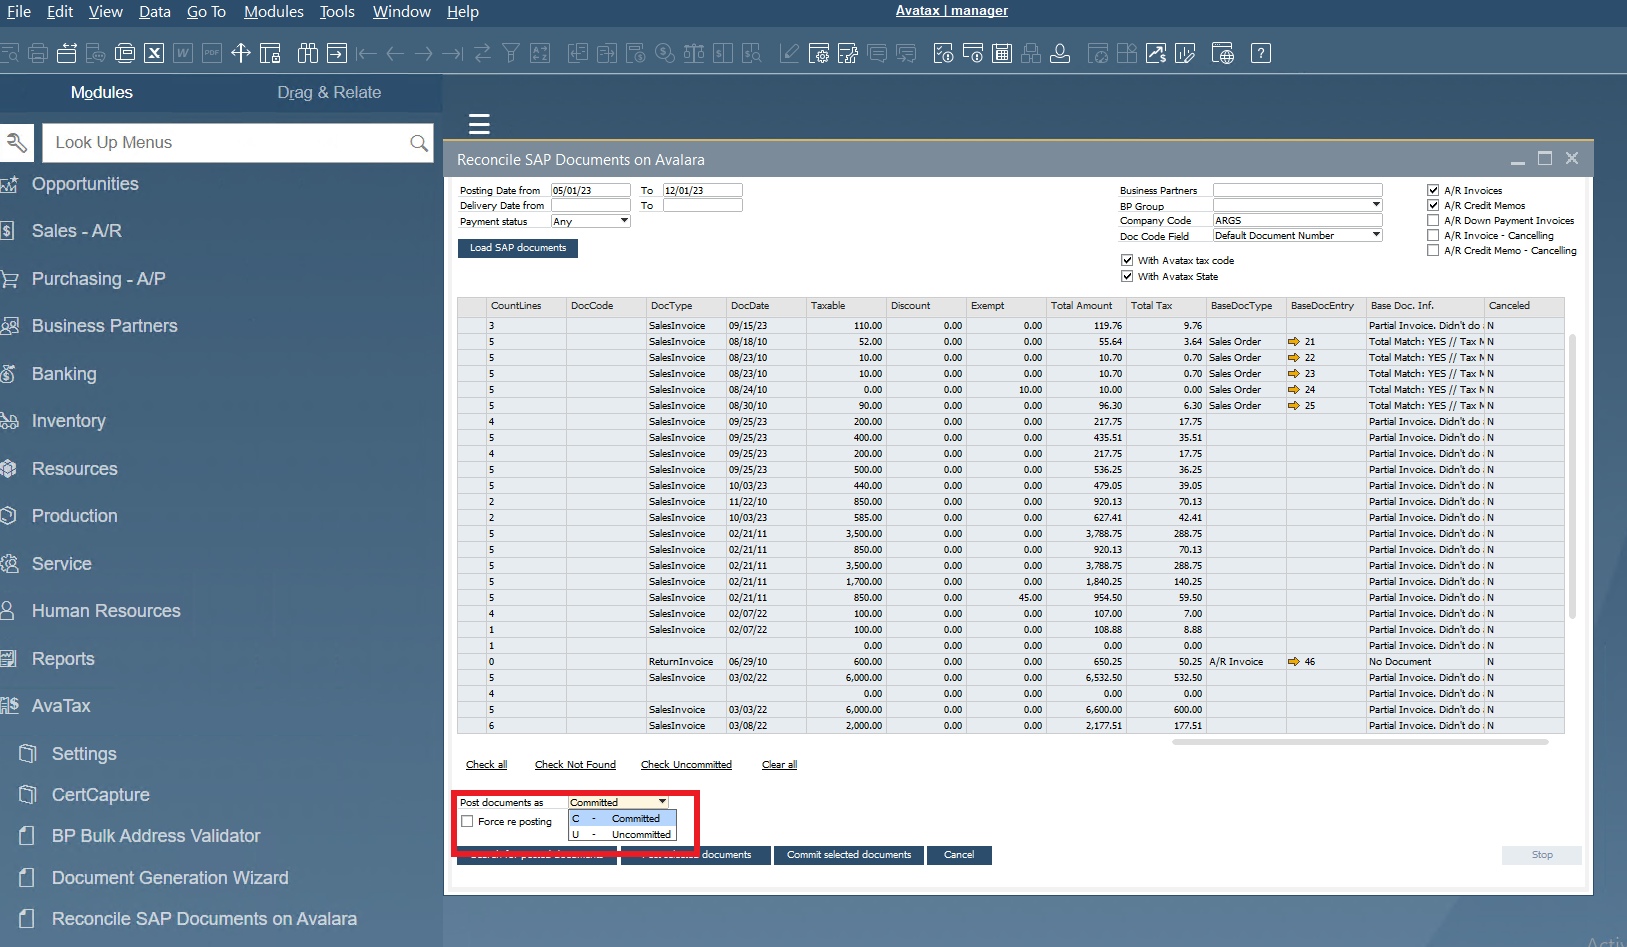
10. Click on “Post selected documents”.
11. Check on the “Post results” column the result message of the uploading.
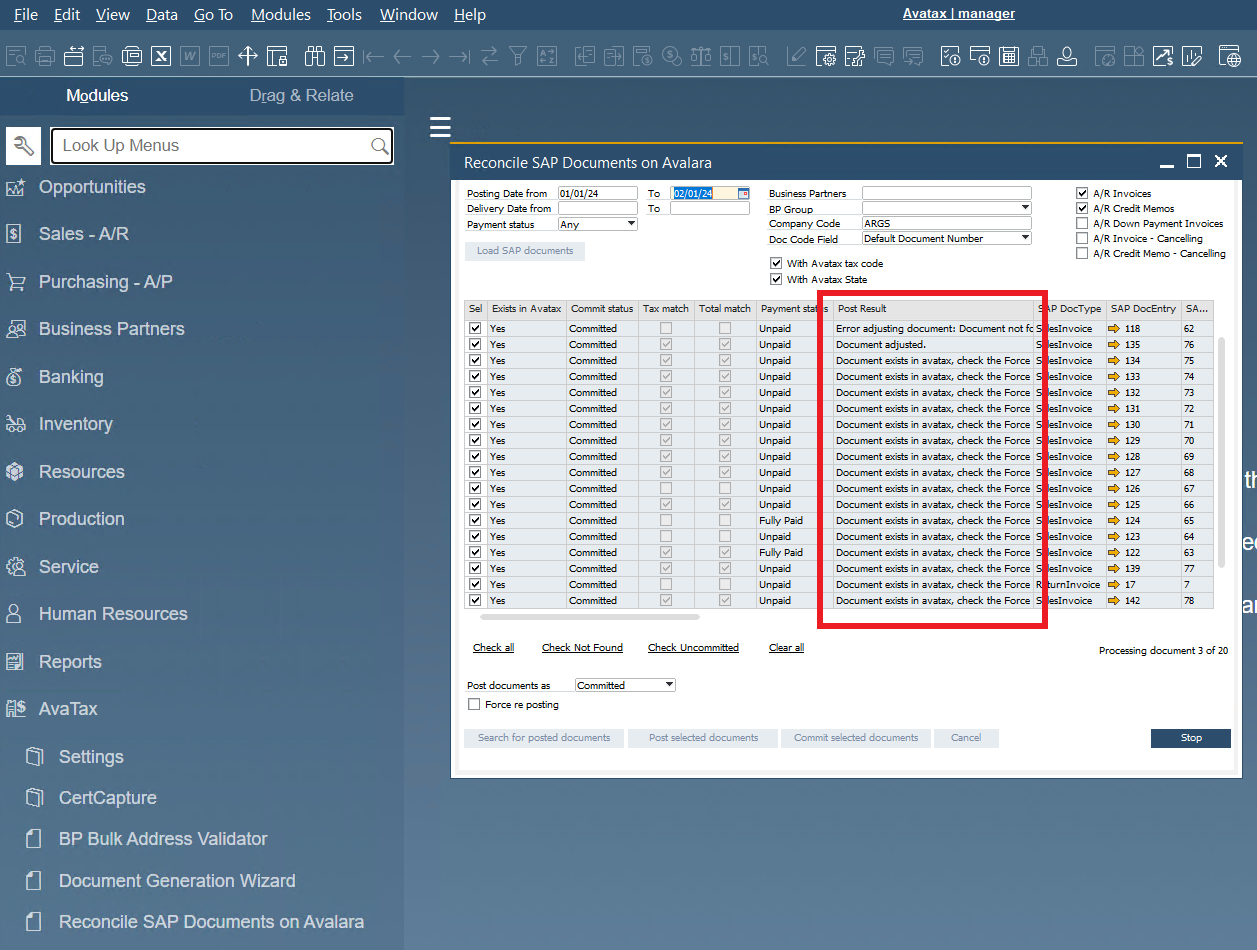
12. In case you made any change in these documents, and you want to post the document in Avalara again with this change done, you can use the “Force re posting” option by selecting the documents you want to repost. Check the option “Force re posting” and press “Post selected documents”